
When setting up columns, users can:
· Change the order
· Reset columns to their default order
· Restoring a Hidden Column to View
To change the order in which columns appear in List View:
1 Select a column header (for example, Name) and drag it to the desired location on the column heading line.
2 Drag the column header until a red vertical bar appears in the new location:
3 Release the mouse button. In this example, the column header, Name now appears between the column header Location and Type.
There are two ways to reset the columns:
To reset columns to the default setting:
1 Right-click anywhere within the results listing. The right-click menu appears:
2 From the right-click menu, select: Reset Columns.
To remove an unwanted column from display:
1 Right-click anywhere within the results listing. The right-click menu appears:
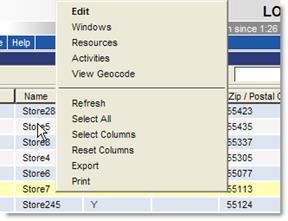
2 From the right-click menu, select: Select Columns. The Select Columns dialog box appears.
3 Click the column header and drag it to the Select Columns dialog box &emdash; specifically to the label Drop unwanted columns here. The name of the column just removed now appears in the Select Columns dialog box.
4 Click
![]() to close the Select Columns dialog
box.
to close the Select Columns dialog
box.
To restore a hidden column to view:
1 From the Select Columns dialog box, click a column (for example Exception) and drag it to the column heading line where you want to insert it.
Ü Note - When selecting the column to add from the Select Columns list, the column name will not change state when selected, but once clicked, it will be captured by the mouse for depositing.
While dragging the column name, a red bar will appear in the column heading line where the application expects the user to drop it. In the following illustration, the user is adding the Exception column between the Element and PO# columns.
2 Click
![]() to close the Select Columns dialog
box.
to close the Select Columns dialog
box.
![]()