To create a new Order:
1 Right-click on the Orders page and select Create.
Or,
Right-click on an Order in the Unassigned Stops quadrant or in the Route Detail1 or 2 quadrant and select New Order.
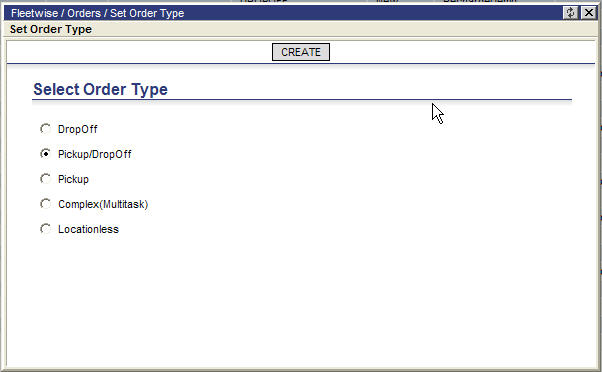
The Set Order Type dialog box appears:
2 Select the type of order being created and click Create.
![]() Note - The
default selection is PickUp/DropOff,
but Route Planner will retain the user’s previous selection when
creating multiple orders.
Note - The
default selection is PickUp/DropOff,
but Route Planner will retain the user’s previous selection when
creating multiple orders.
The Create New Order page appears:
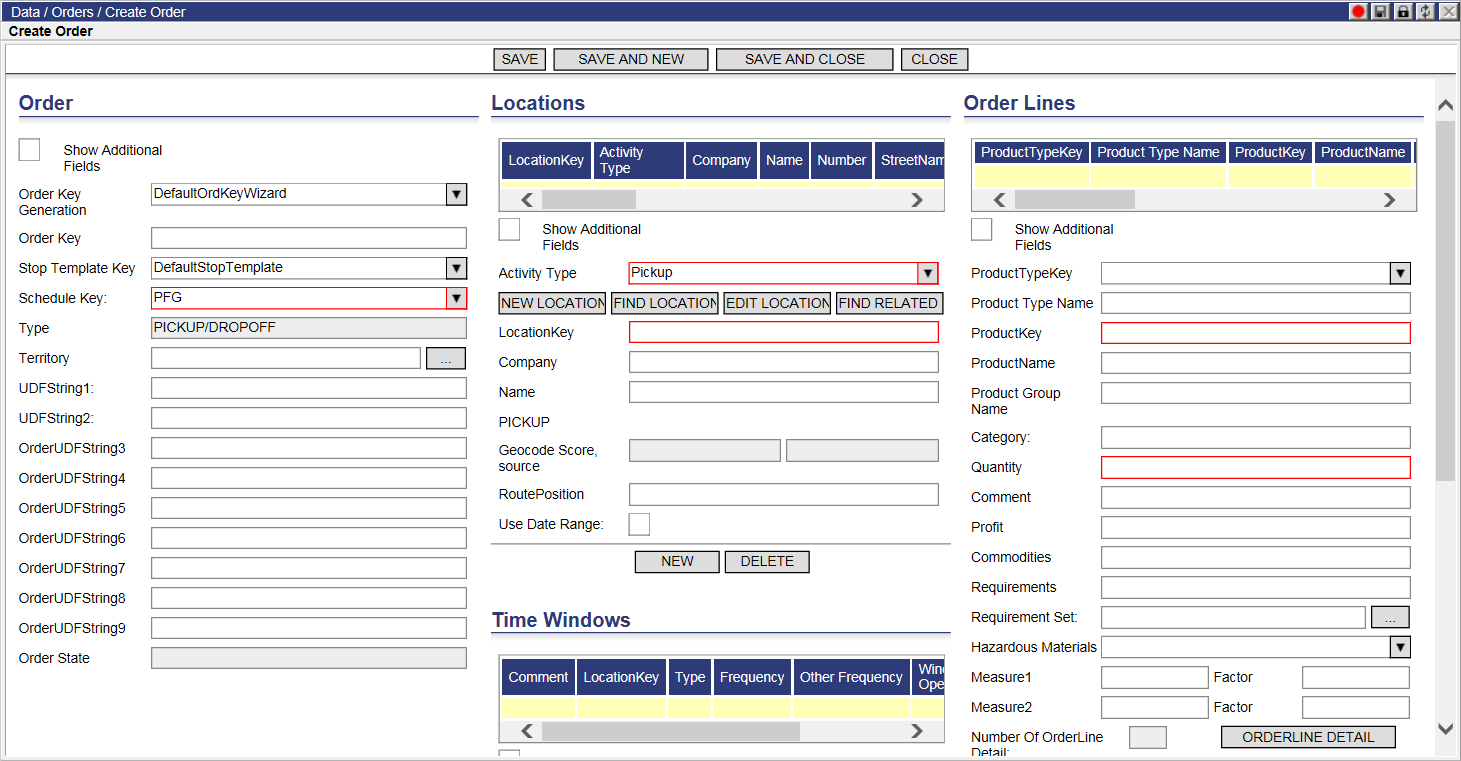
Ü Note - Selecting the Show Additional Fields checkbox displays additional fields for that section. The Header Info, Profit, Status, Requirements and RequirementSets fields show as of version 8.2.
3 To
fill the Territory field under the Order section, click  to select a saved territory from the Territories
dialog box.
to select a saved territory from the Territories
dialog box.
4 Under Location, do one of the following:
• Click New Location&ldots; to create a new location to add to the order form. See Creating a New Location for more information.
• Click Find Location&ldots; to browse the list of saved location. Double click a location in the list to add it to the order form.
• Click Edit Location&ldots; to edit the selected location in the order form without leaving the page. See Editing a Single Location for more information.
![]() Note - For Pickup/Dropoff
order types, two locations will need to be created or selected.
Note - For Pickup/Dropoff
order types, two locations will need to be created or selected.
5 Enter a Location Key and any additional information for this location.
6 Under Time Windows, select an Associated Location and a Type from the drop-down menus and enter any additional information for this time window. Click New to create additional time windows.
![]() Note - The Time
Window Combo Control has the following columns: LocationKey, Comment,
Earliest Date and Time, Latest Date and Time, Open and Close.
Note - The Time
Window Combo Control has the following columns: LocationKey, Comment,
Earliest Date and Time, Latest Date and Time, Open and Close.
7 Under
Order Lines, click in the Requirement Set field will allow the user to
select a saved requirement set from the Requirement
Set dialog box.
8 Enter a Product Key.
9 Enter the quantity for this order line.
If desired, enter any additional information for this order line. Click New to create additional order lines.
10 When finished, click Save to save the new order, but stay on the current page, or click Save and Close to save the new order and return to the Order list page. Save and New will save the current order and take the user to a blank Create New Order page.
