To add Unassigned Stops to a Route:
1 Make sure the details of the Route to be edited are in the bottom (Details) quadrant and that the Map view is open in the top page.
2 Right-click anywhere on the map and select Show Unassigned Stops.
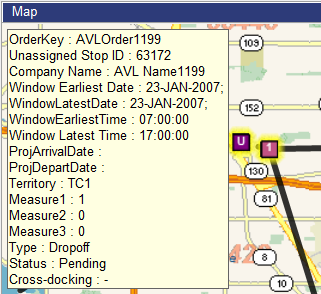
Each Unassigned Stop appears on the map as a purple box with a U in it.
Ü Note - You can hide Unassigned Stops at any time by selecting Hide Unassigned Stops from the right-click menu.
3 Right-click on the Stop before the point in the Route where users want to add the Unassigned Stop.
4 Select Anchor from the right-click menu.
5 Click on the Unassigned Stop.
A yellow line connects the first Stop with the Unassigned Stop.
Map data © 1987-2017 HERE
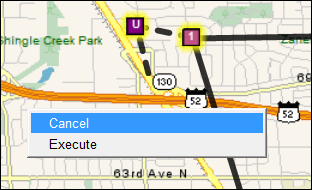
6 Double-click on the Unassigned Stop, or from the right-click menu, select Execute.
Ü Note - You can select Cancel from the right-click menu, instead of Execute, to cancel the assigning function.
Map data © 1987-2017 HERE
Descartes Route Planner adds the Stop and renumbers the rest of the Stops on the Route.
i Tip - You can assign more than one Unassigned Stop. Make sure to select an assigned Stop first, and then select the sequence of Unassigned Stops in the order they should appear on the final Route. Only Unassigned Stops can be selected after setting the anchor point; however, you can resequence the Route after adding all of the Stops.
After any assignment, users can press CTRL-G to display the Optimization Before and After Results to evaluate the route, time and distance totals before and after the assignment. For more information, see the Viewing Before and After Results section.
![]()