Users can view alerts, show route history on an alert, reverse the geocode of an alert and show a specific alert on the map all from the Alert Management page.
To access these options:
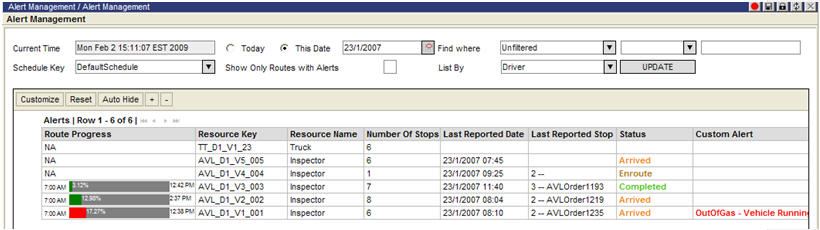
1 Select Data > Alert Management. The Alert Management page appears.
2 Use the drop-down menus to filter the results by the date, location and ScheduleKey to specify which routes to view and click Update. The specified routes will appear in the Alerts table.
3 Right-click on a route and select one of the following options from the right-click menu:
• View Alerts&emdash; Displays the List Alerts for Routes window, listing all alerts on the selected route.
• Show Route History&emdash; Displays the List Route History window, allowing the user to see the selected route’s entire history.
• Reverse Geocode&emdash; Allows the user to use a new location’s latitude and longitude to access the location’s street address and geocode it. See Reverse Geocoding Locations for more information.
• Show on Map&emdash; Displays the selected route in the Map window.
